The Usergroup Sercurity window is how you define what parts of the system a usergroup has access to. All users are assigned to one usergroup, determining their access level.
Navigation
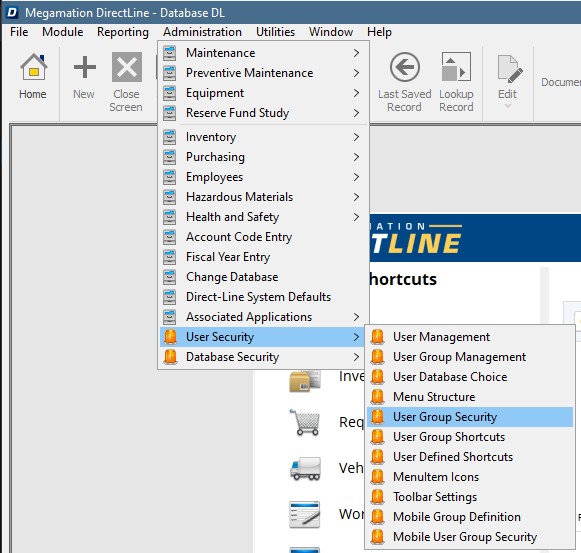
Access the Usergroup security by going to:
- Administration
- User Security
- Usergroup Security
Note: The User security menu is enable on a user by user basis in the User Entry screen.
Assigning Access
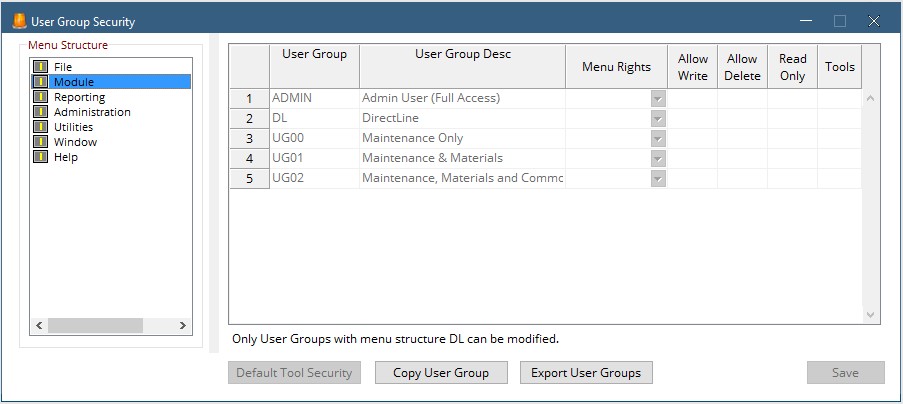
The user group security window is composed of two panes. The left pane shows the systems menu structure. Expand the tree by double clicking a line. For example, double-click Module to see the list of modules in the system.
The right pane lists the user groups as well as the rights of that group to the module selected on the left.
- Menu Rights
- Allow Write/Delete
- Tools
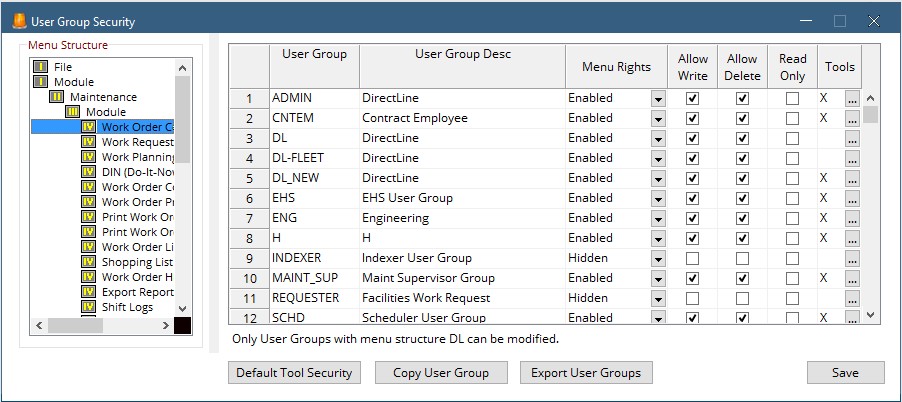
Hit the drop down to make this screen or module Enabled, Disabled or Hidden.
Enabled – Use the check boxes to decide how much access the group will have to this item.
Disabled – This item will not be accessible to this group, even when linked from another screen.
Hidden – This item will be hidden on the menu structure
Use these checkboxes to assign the level of access to the item.
Allow Write – Gives the user access to add information to the system by creating or editing records
Allow Delete – Gives the user access to remove information from the system by deleting records
Read Only – Gives the user access only to view records but not change them.
Use this screen to select the tools to which the user has access.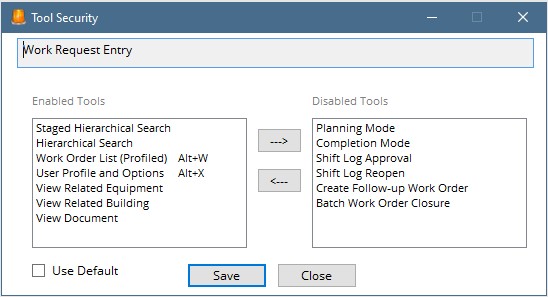
Be sure to hit Save in the bottom right corner after each change. if you do not hit save but choose another screen on the menu your changes will not save.