This Article will show the process to add a user to the system. It will cover adding users for Directline, Directline Mobile and Web Work Order Entry pages.
Directline Mobile and HTML Work Order pages are optional features, if you are interested in learning more about them, contact our support team.
Navigation
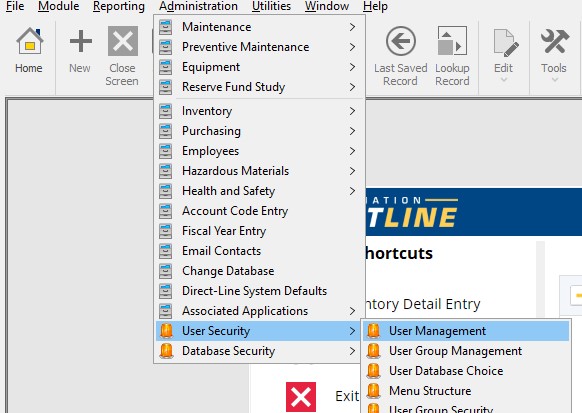
To Create a user, go to:
- Administration
- User Security
- User Management
Note: Not all users will have access to the security module.
Creating a Basic User
- Mandatory Fields
- Recommended Fields
- Additional Items
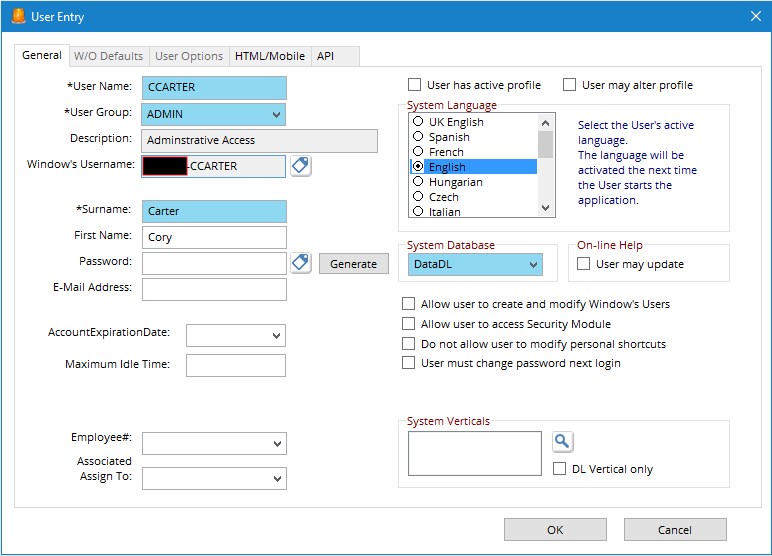
The following fields are mandatory and need to be filled before saving the user account. This is the minimal information required to create the user account.
Username – This is the user’s ID, the system will automatically add a Prefix to it.
Usergroup – The usergroup sets the user’s access level. Groups can be created in the security menu.
Surname – Only the users last name is mandatory.
Password – The password must meet specific criteria and must be changed on the user’s first login.
Database – The default database is usually DataDL, but if your system has multiple databases you can contact Support and they can help you find the appropriate database for your user.
First Name – Having first and last names can make it easier to recognize a user.
E-mail Address – Enter the user’s email address so it can be used for things like password resets and for sending emails within the system
Employee # – Link an employee to the user and it will autofill the users name and email address. this step is necessary for all mobile users. Click here to learn how to create an Employee Entry
Account Expiration Date – Enter a date in this field as an end date for the user’s access. if this field is left blank the account will never expire.
Maximum Idle Time – the default idle time (length of time the session can remain inactive before being logged out) is 30 minutes. It can be increased or decreased by entering a value in this field. Note: Increasing idle time can increase usage hours used for billing. check with your account manager if you want to know how this might affect you.
Adding User Defaults
Check the “User has Active profile” box at the top of the screen to enable the WO Defaults and User Options tabs on the User entry screen.
- WO Defaults
- User Options
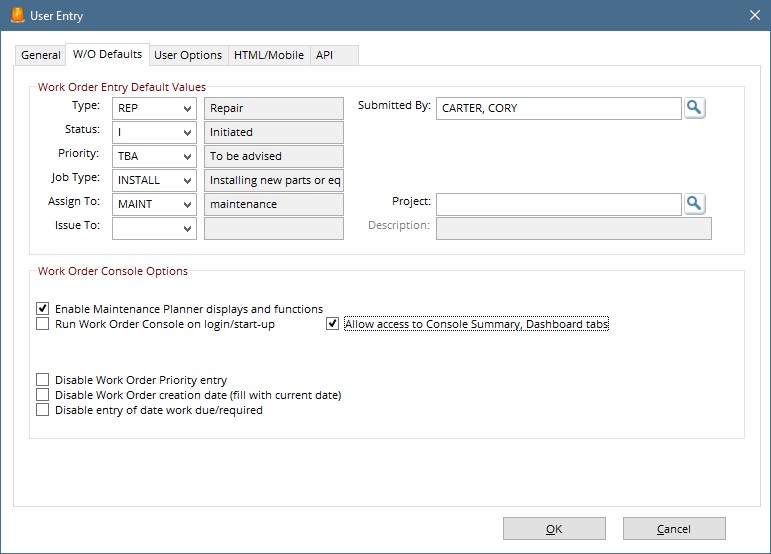
Here you can set defaults for when work Orders are created by the user. One common practice is to fill the Submitted by so that when a WO is created the user’s name is filled automatically.
The Work Order Console options section is where we check boxes to enable the Summary and Dashboard tabs as well as giving access to the Planning Mode.
The last three checkboxes will disable access to change the priority, Work Order Creation Date and Date Due for the user on all WO screens.
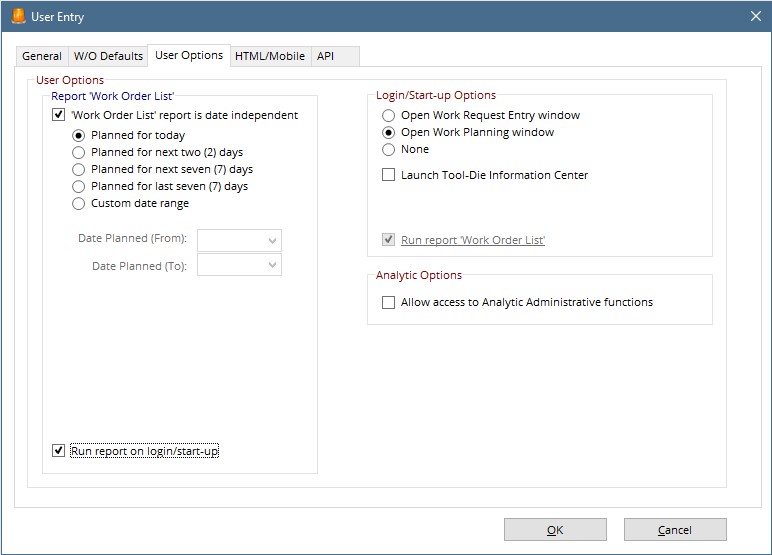
Here we can set Startup options for the user. having a WOrk order list appear will show a list of all WO issued to the user (Must have an Employee # linked). Use the radio buttons to decide what planned date range of WO to display.
On the right-hand side choose to launch WO Request or WO Planning screens to open when the user logs in.
Creating a Mobile User
Giving a user access to Mobile requires linking the user to an employee on the General tab. Then go to the HTML/Mobile tab.
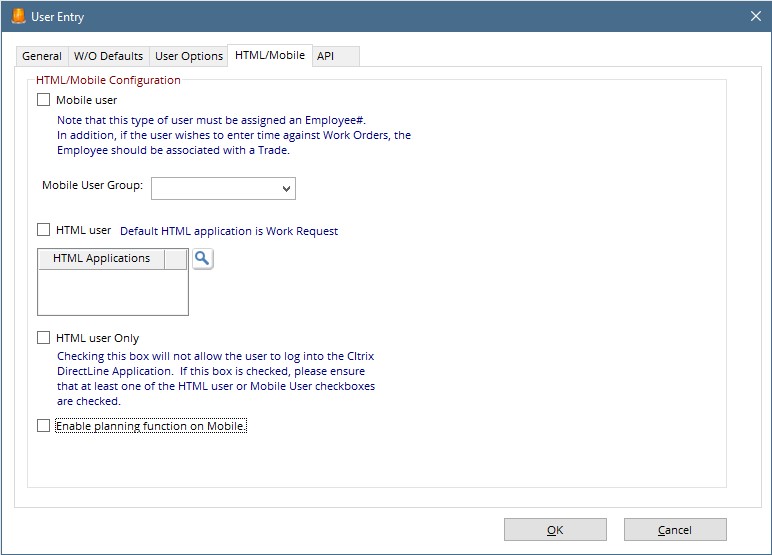
Check the Mobile User box at the top of the window, then hit the drop-down on the Mobile User Group box and choose a user group from the list. The default user group is DLWEB, but if you are unsure what user group to choose, contact Support and they can help you find the correct one.
HTML user: This check box gives the user access to the web work order entry page if applicable.
HTML user Only: Checking this box will give the user access to only the Mobile interface. The user would not be able to log in to the full desktop interface.
Enable Planning Function on Mobile: Checking this box will give the user access to edit certain fields on the WO for the purpose of planning work. the fields that can be edited include Issue To, Status, Equipment, Description and others.
Hit OK.
Deleting a User
To delete a user, simply highlight the user in the User Management screen then hit the Delete button on the right side of the screen. when the confirmation prompt comes up hit OK.

Note: Once a user has been deleted in can not be restored, it would have to be completely recreated.