The Physical Count Management module is designed to make cycle counting easy and effective.
Navigation
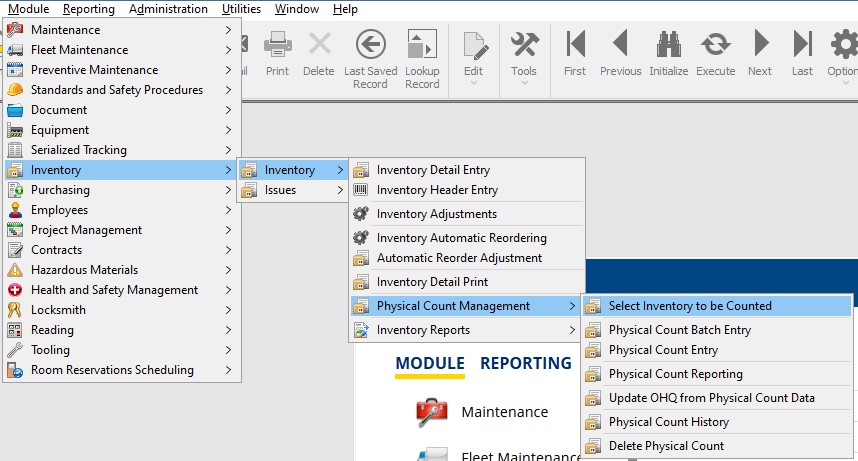
Navigate to The Physical Count Section by going to:
- Module
- Inventory
- Inventory
- Physical Count Management
- Select Inventory to be Counted
Selection Criteria
Choose first which warehouse the parts will be selected from. Parts can only be selected from one warehouse at a time.
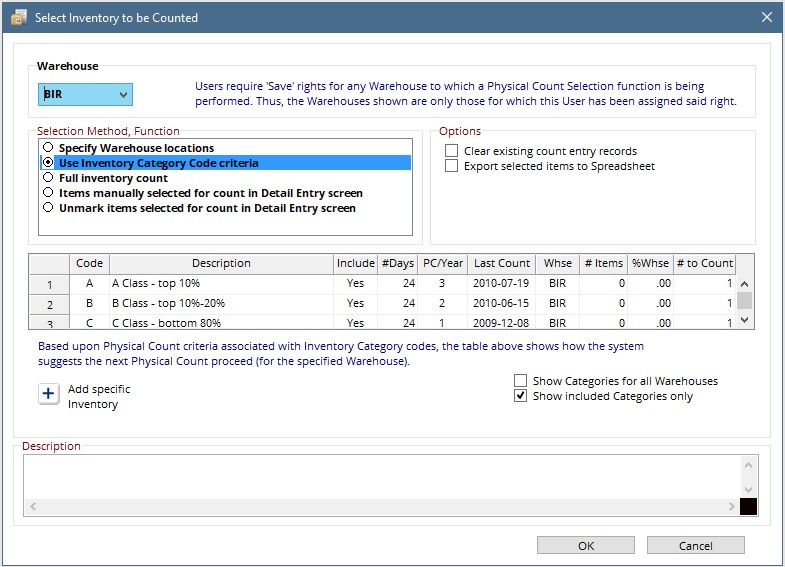
Next decide on the function and selection method using the five radio buttons.
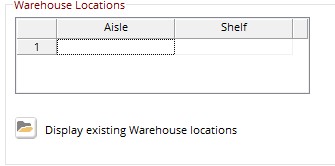 Once the radio button is chosen, a new button will be made available to display existing warehouse locations.
Hit the Display Existing Warehouse Locations button to see a list of locations in the current warehouse.
Select from the list and hit ok.
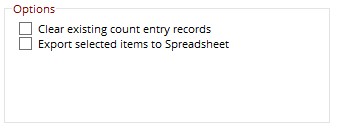
Once inventory is chosen, use the check boxes on the left to:
- Clear existing count records – This will clear any counts that have previously been entered but not finalized.
- Export selected items to Spreadsheet – This will export the list into a printable spreadsheet. this can be used for collecting count data.
Hit Ok
Next Steps
The Count Identifier is displayed. Note this for later as it will be used to identify the count when entering count data.
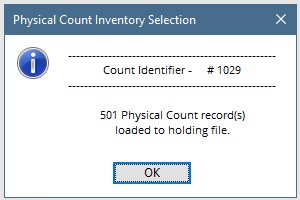
Hit OK.
If the Export to excel option was chosen, the Physical Count Reporting screen will be displayed with the new count identifier selected.
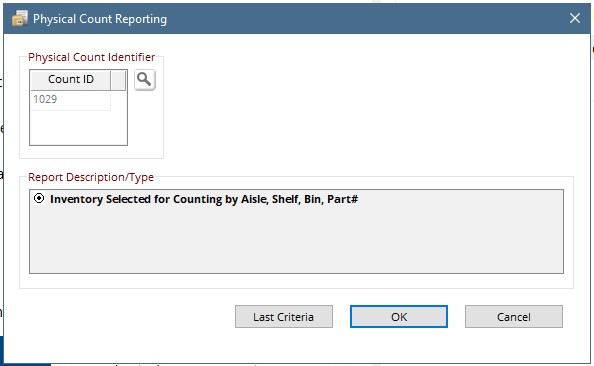
Hit ok to display the spreadsheet.
The spreadsheet is formatted for printing and includes a column for recording the counted QTY.
At this point there are 2 options for counting.
Desktop
Mobile