This article will look at the process of setting up a purchasing Heirarchy and the screen used to do this. Before beginning to setup the heirarchy be sure the system is set to use the Full Package Purchasing in Directline System Defaults as well as deciding whether to use the login password or a purchasing specific password.
The example in the article will use the login password for approvals.
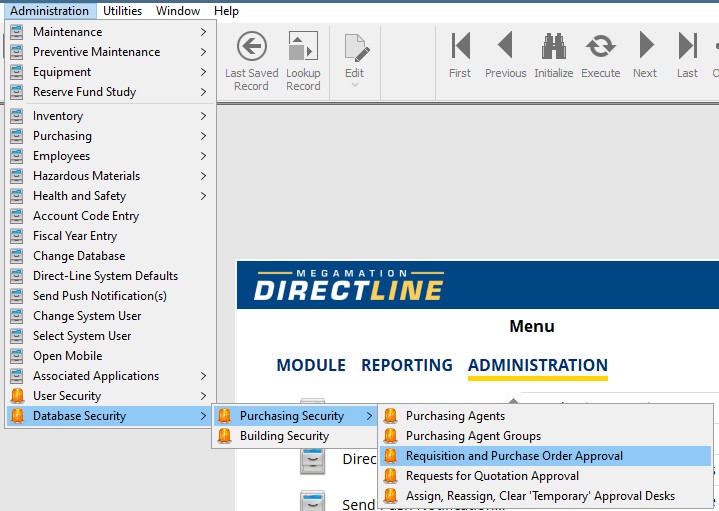
Approval levels are set in the Requisition and Purchase Order Approvals screen.
- Administration
- Database Security
- Purchasing Security
- Requisition and Purchase Order Approvals
How does it work?
When a Requisition is created, the approval password is entered. If the user entering the password has sufficient approval limit the Req can be turned to a PO. If the user does not have a sufficient limit, the Req will go to the desk of the next approver.
The next user will enter the approval password and if they have a sufficient limit a PO can be created. If not it will go to the next approver, this process will continue until it gets to an approver with sufficient limit.
Notes and Best Practices:
Always start creating the hierarchy at the top. Any user with limited approval needs to have a next desk before saving, so start with the final approvers and work your way down.
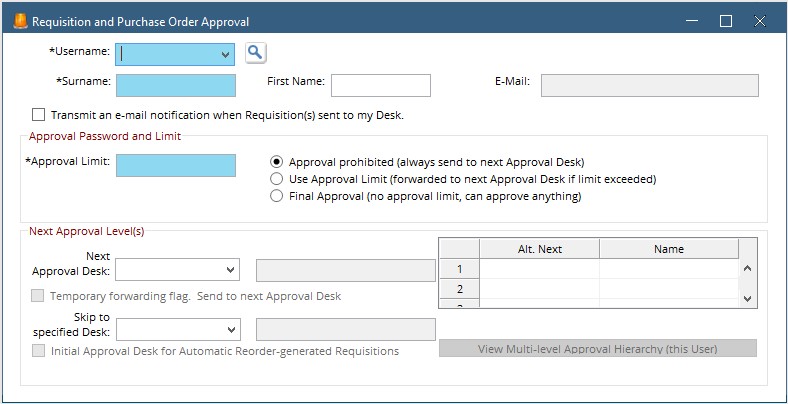
Enter the username, or hit the drop-down and choose from the list of users.
Checking the “Transmit an email notification when Requisitions are sent to my desk” checkbox will trigger an email to be sent to this user when a Requisition needs their approval. Note: for this to work, the user must have an email address linked to their account. This can be done in User Management.
- Approval Password and Limit
- Next Approval Level
There are three options to choose from.
1. Approval Prohibited (Always send to the next desk.) – These users can create a requisition but cannot approve any. Every Requisition they create will go to the next approver.
2. Use Approval Limit (Forward to the next Approval Desk if limit exceeded) – These users can create a requisition and approve it up to their limit, which is noted to the left. Any requisition above the set amount will be sent to the next desk noted below (explained on the next tab)
3. Final Approval (No Approval limit, can approve anything) – These users can do the final approval regardless of the amount of the requisition. This is the group of users that need to be setup first.
The next approver is who requisitions will be sent to when this user’s limit is not sufficient.
The Skip to Specified desk option is used as a temporary approver when the Next Approver is unavailable.
Use the At Next box to make other desks available to send the REQ to.