Creating inventory in your system all starts with the Inventory Header Entry screen. All basic inventory information is entered here before a part can have more detailed information included in the Inventory Detail Entry or can be added to a Purchase Requisition for re-ordering.
Navigation
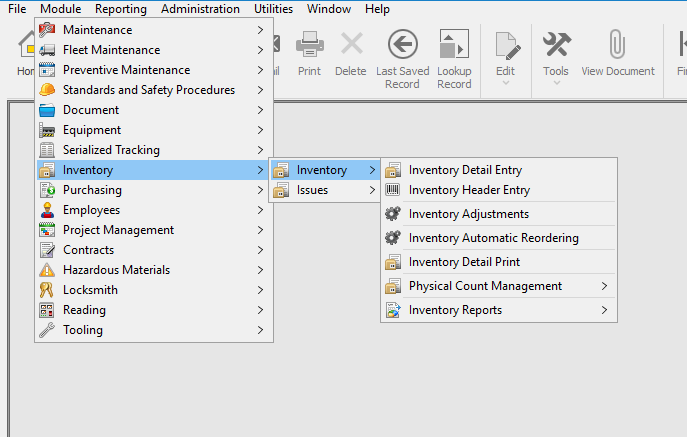
To access the Inventory Header Entry screen simply navigate to it via:
- Module
- Inventory
- Inventory
- Inventory Header Entry
Inventory Header Entry Process Flow
- Mandatory Fields >
- Recommended Fields >
- Optional Fields >
- Tags Tab >
- Save
These Fields are noted by an asterisk on the label as well as the field being highlighted in green.
On the Inventory Header Entry Screen there are 2 mandatory field(s):
Part# – This is the unique identifier for the Inventory record. This ID can be made up of Letters, Numbers, and dashes or underscores. No spaces or other special characters are allowed.
Type – There are 2 basic types, ST(Stocked) and NS(Non-Stocked). Stocked parts are anything where an OHQ will be kept. Non-Stocked are parts where the OHQ will not be kept or tracked such as parts which are ordered when needed or some consumables.
Unit of Measure – This is the Unit of measure in which the items will be consumed. Unit of Measure conversion factors can be setup to convert the Suppliers unit of measure when receiving purchases.
Inventory Class – This is the type of parts. These codes are created in the Administration module and usually are things like Bearing, Filter, Tire, etc.
Aside from Mandatory fields, there are others that provide valuable information to the end user. Here are a few of these:
Description – This is a text field used to describe the part.
Manufacturer & Manufacturer Part# – These are text fields, use them to record the Manufacturers information. Note: Manufacturer Part # IS a searchable field on both Header and Detail searches.
Cost and Average Cost – These fields can be filled when setting up the part but will be filled automatically when using the part on purchases.
Category – This field is used to set the classification of the inventory. Inventory classifications are used in the Physical Counting module for prioritizing counts.
The Tags tab is used with the Serialized tracking module. Contact Megamation support to learn more about Serialized Tracking.
Once all Mandatory and chosen Optional fields have been entered simply use the ![]() button on the Directline toolbar to create this new piece of inventory.
button on the Directline toolbar to create this new piece of inventory.