This is where a PM entry can be expanded to include documentation, checklists as well as planned labor and materials. Adding details to PM provides value in a number of different ways including forecasting, material planning, and deficiency reporting.
Note: This screen is equipment specific for PM and PMI types that may have more than one piece of equipment.
Navigation
From the PM Procedure Entry screen, display the PM to edit.
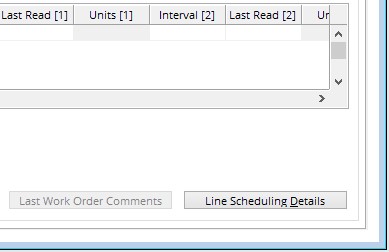
Click the Line Scheduling Details button in the bottom right corner.

Select Equipment
The Detail screen of the PM is equipment specific. If there are multiple equipment on the PM Header then fill the PM Details for each Equipment. PM# and Equipment# re the only mandatory fields on this screen.

- Personnel
- Materials
- Save
This tab is divided into 3 sections, Below is an Explanation of what each section is used for. Filling in this information is not mandatory for the PM, but each one does provide value.
Personnel – Enter the Trade who will be doing the work, the number of persons required, and an estimate of the hours needed for each person to complete the PM. The Est. column calculates the total number of hours. For PMs that require multiple trades use the function field to put a brief description of what that trade will be responsible for.
Adding planned hours to PM entries gives the ability to do things such as PM Forecasting, Utilization tracking, and Workload projections.
Maintenance Checklist(s) – Attach electronic checklists to the PM. These checklists would then be attached to any work order that comes from the PM. Checklists can be filled from Mobile or DL Interfaces and once attached to a WO are required to be completed before closing the WO. Click Here to learn about creating checklists. Note: Unlike filling a paper or excel checklist, information entered on these checklists is reportable and comes with other features to streamline PM Deficiency processing.
Reference Document(s) – Attach Standard and Safety documents to the PM that can be printed with the PM work orders. Click Here to learn how to create Standard and Safety documents. Note: These documents are meant to be printed and are not viewable from mobile.
This tab is divided into 3 sections, Below is an Explanation of what each section is used for. Filling in this information is not mandatory for the PM, but each one does provide value.
Materials – Fill all Inventory parts as well as quantities required to complete the PM.
Adding planned materials to PM entries gives the ability to do PM Forecasting for material requirements and, when used in conjunction with the Automatic Reorder process, helps maintain inventory levels for planned PM work.
Tools – Tools are created through the tooling module. Contact Megamation Support to learn more about the tooling module.
Drawing References – Created in the Document module. This can be PDF, JPEG, Excel or MS Word files.
Once all fields have been filled, Hit Save on the toolbar. Remember that this screen is equipment specific, so details need to be entered for each piece of equipment on the PM.
Note: Use the “Copy Details From” and “Copy Details To” buttons at the bottom of the screen to duplicate details for other like equipment.
