The Report Definition Wizard gives users the ability to create custom reports on their own. these reports can come from almost any table and can include features such as subtotals, and pre-set filtering criteria.
Navigation
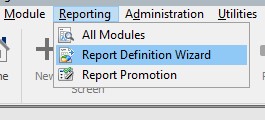
Navigate to the Report Definition Wizard by going to:
- Reporting
- Report Definition Wizard
Creating a Report
These steps will take you through the Report Definition Wizard one screen at a time.
- Step 1
- Step 2
- Step 3
- Step 4
- Step 5
- Step 6
- Step 7
- Step 8
- Step 9
Choose New to create a new report.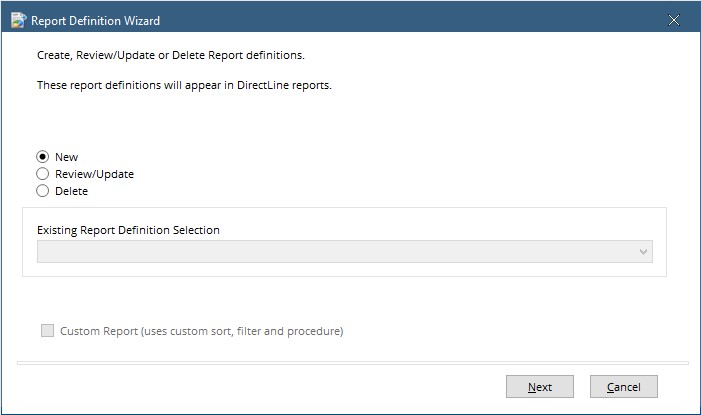
Select Review/Update to edit an existing Report.
Select Delete to delete an existing report.
Hit Next
Note: When Editing or deleting, you may have the ability to delete some reports you did not create. Once a report is deleted or changed it is the same for all users and cannot be recovered without re-creating the report. To protect your reports from deletion or editing by other users, use Report Promotion.
From the list, select the table that contains the information you wish to report on. For a complete list of common tables and what information they contain, click here.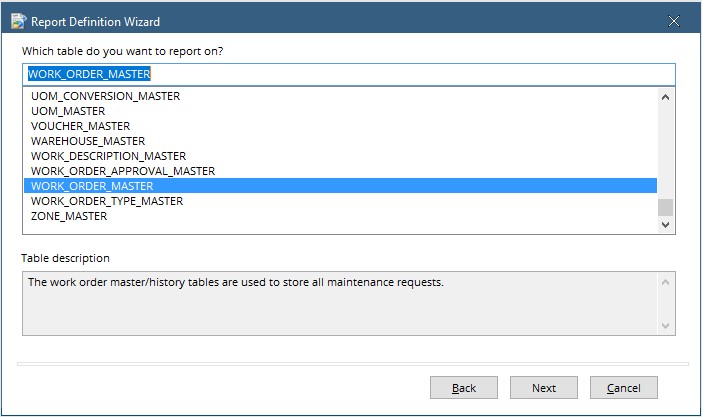
Hit Next
Click Add to display a list of fields on the chosen table.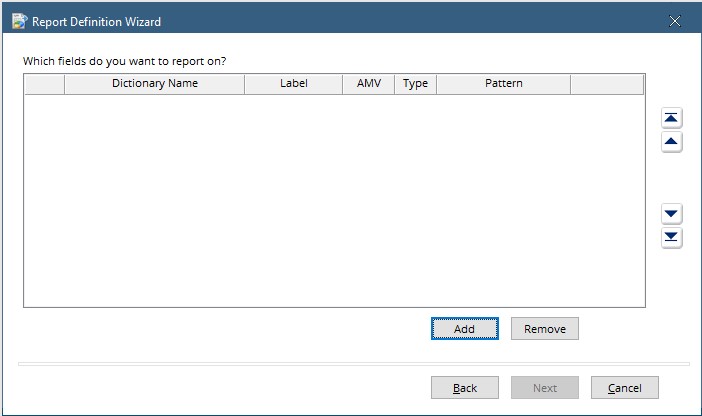
From the list of fields, click on each field to add to the report. The order the fields are selected is the order they will be added. 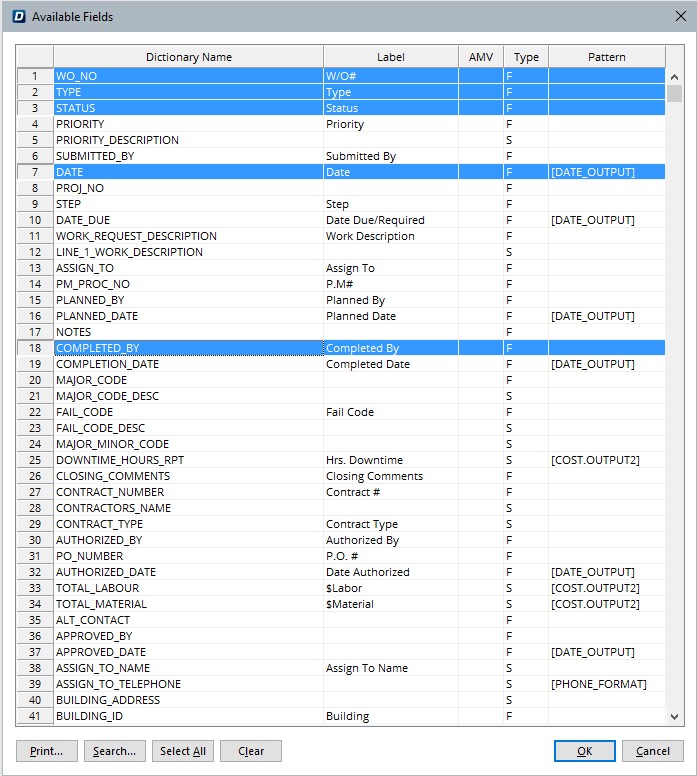
A Note About AMVs
AMV (Associated Multivalue) is a column that is used to identify a field as part of a multivalue group. when choosing fields, choose fields from only 1 multivalue group. for example, choose fields where the AMV column is blank and fields with a 1, or fields that are blank and fields with a 2, but do not choose fields with 1s and 2s on the same report. this will cause inconsistency in the exported data as well as affecting sort and filtering functions.
Here the chosen fields are displayed. Highlight a field and use the arrow keys on the right to re-order the fields if needed.
Use the Remove Button to remove a field.
Use the Add Button to add any additional fields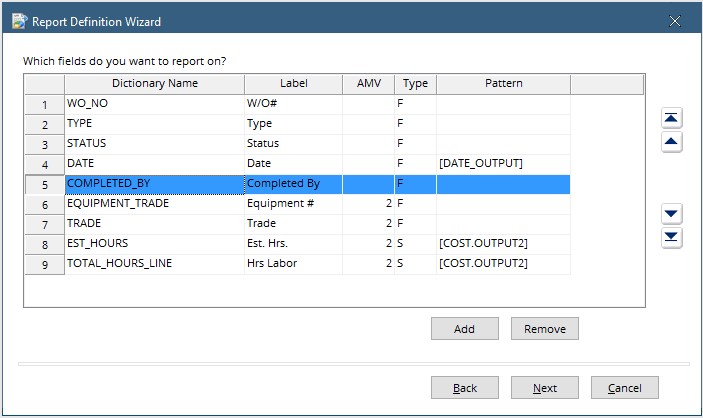
Hit Next
If there are number fields on the report, they can be totalled, or subtotalled, from this screen. In the top pain select the fields to total.
Below, select a field to subtotal by (if desired). This will become the primary sort each time the report is run.
Check the Suppress Details box to export only the subtotals to the spreadsheet. 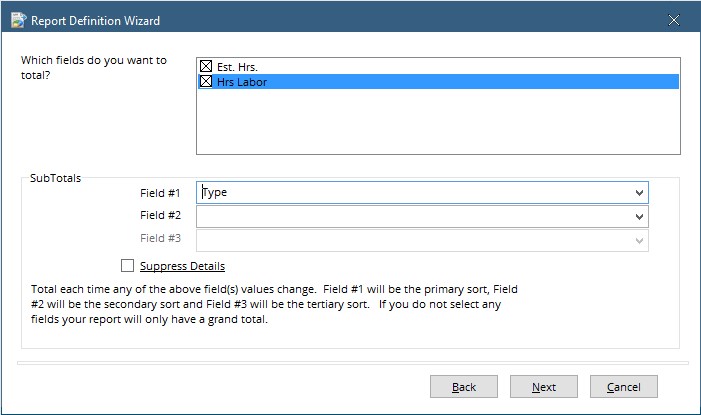
Hit Next
Here, choose which fields to Sort by. Select as many as desired to give the option to sort by any of them.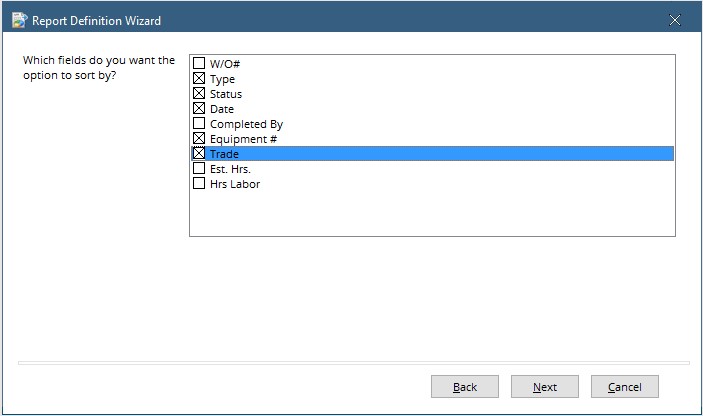
Hit Next
Choose up to 8 fields in the top pane to filter by. Note that filtering by code rather than description where available is much more effective. (i.e. filter by Equipment # rather than Equipment Description.)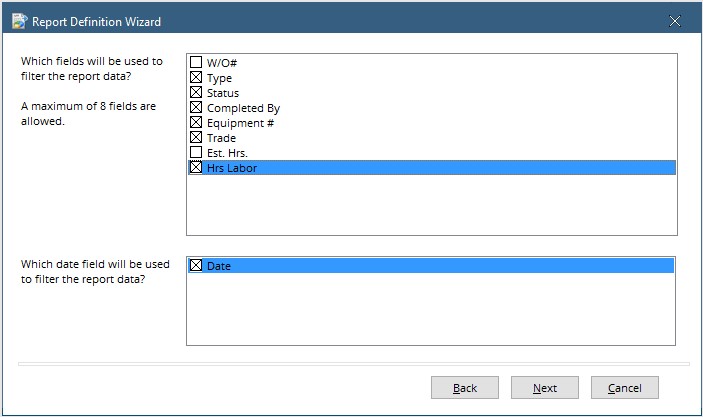
The bottom pane is for date range and is only available if a date field has been chosen when adding fields in Step 3. If multiple date fields have been added, choose only 1.
Hit Next
Here we can add default sorts and Default searches. This would save time when running the report later. The criteria can still be changed when running the report if needed. 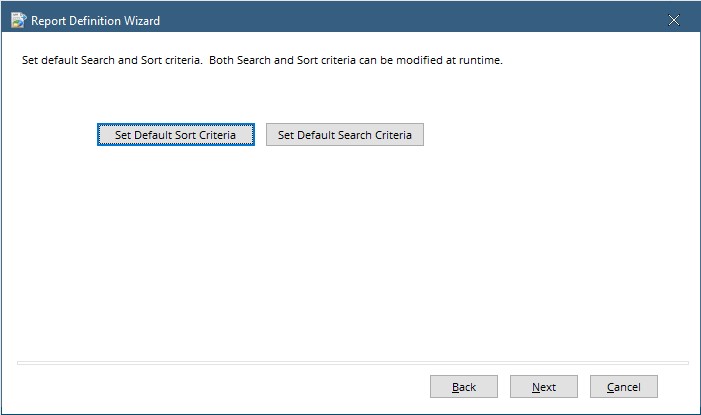
Hit Next
Every report needs to have these last 4 fields filled in.
Report Name – This is the name the report will have in the All Modules windows when it is being run.
Report Title – This will be the title line at the top of the exported spreadsheet.
Report Description – This description will be displayed on the All Modules window when the report is chosen.
Module – Hit the drop-down to choose which module the report should be part of.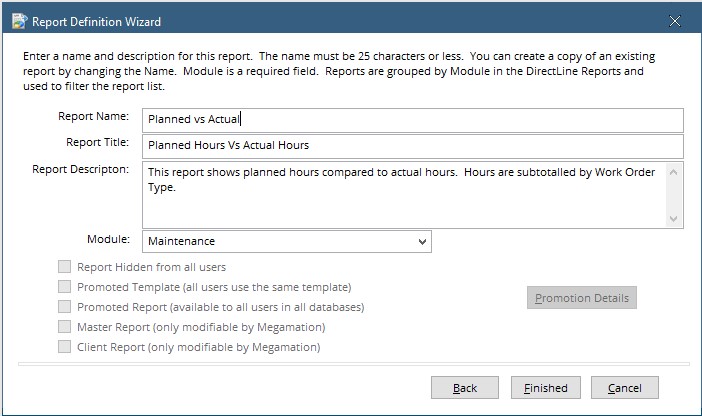
Hit Finished