The Work Order Console is a tool that can perform many tasks and be configured for users of many different roles. The console is user-specific, so any setting mentioned here can be set to each user’s preferences.
Accessing the Console
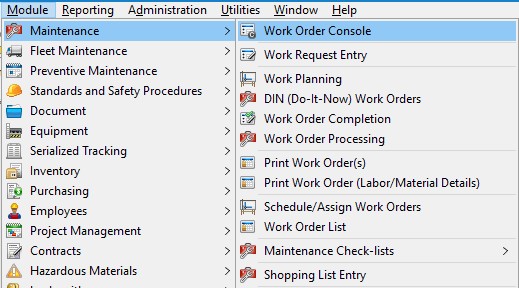
Access the Console by going to:
- Module
- Maintenance
- Work Order Console
Pieces of the Console
There is a lot to the Work Order Console and it can seem daunting, So let’s break it up into pieces.
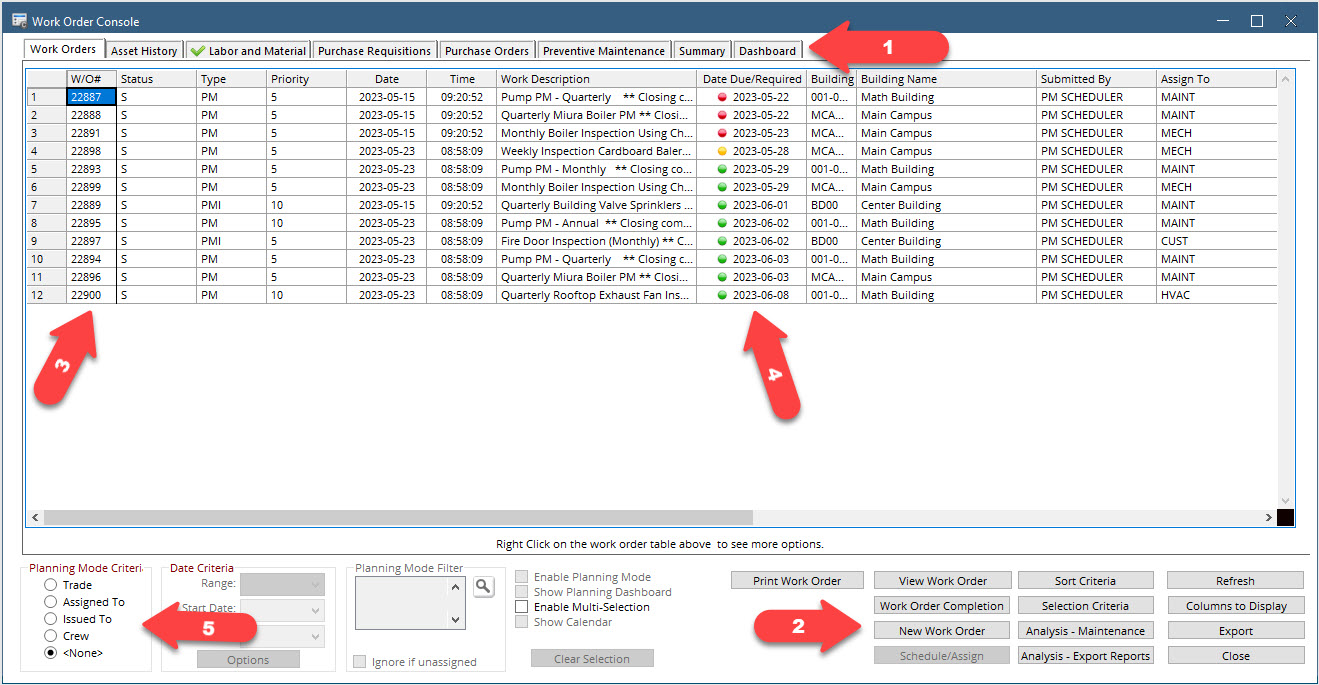
Tabs
- Work Orders
- Equipment History
- Labor and Material
- Purchase Requisitions
- Purchase Orders
- Preventive Maintenance
This Tab shows the List of Work orders that match the selection criteria. Use the Buttons in the bottom right corner to adjust what work orders are displayed, what order they are in, and what columns are displayed. How to do this is explained in the next section.
Planning – Double-click on any WO number to open that work order in the Planning screen. This is where you determine who will do the work and when as well as many other options. See Work Order Planning for more details.
Completion – Right-click any WO Number and click Work Order Completion to open the work order in the completion screen. This is where actual time and materials will be entered and completion information will be filled in. See Work Order Completion for more details.
Using the Columns to Display, Selection Criteria and Sort Criteria buttons the layout as well as the data displayed can be customized to meet each user’s needs. This will be described in detail in section 4 of this article.
Highlight a work order on the Work Orders tab.
Use the Equipment History tab to view the maintenance history of the equipment on the highlighted work order. If there is more than one piece of equipment on the highlighted work order, use the equipment drop-down in the top right to choose which equipment to display the history of.
This list will show all work orders, PM or corrective, that have ever been created for this equipment. there is a checkbox at the bottom of the screen to show work orders that have been transferred to history, if necessary.
Use the buttons in the bottom right corner to change what columns are displayed and to export the full list to Excel as it is displayed.
Highlight a work order on the Work Orders tab.
Displayed is a list of any Labor or materials which have been charged to the work order already.
Labor – This section displays any actual labor posted to the work order.
Note: Lines with a trade noted but no employee or hours are planning lines. Open the work order in the planning screen to see a breakdown of planned labor.
Parts – This section displays both planned and issued parts with their respective quantities. Any parts which have planned but not issued quantities will be noted with a red X if the planned quantity is more than the On hand quantity or a green check if the on-hand quantity is sufficient.
Highlight a work order on the Work Orders tab.
In the top section, any requisitions where the highlighted work order number has been noted will be displayed. Choose a requisition in the top section to see its line items broken down in the bottom section.
Buttons in the bottom left corner allow for viewing the requisition in the Requisition Entry screen, viewing the supplier information, or creating a new Requisition in the requisition entry screen.
Highlight a work order on the Work Orders tab.
In the top section, any POs where the highlighted work order number has been noted will be displayed. Choose a PO in the top section to see its line items broken down in the bottom section.
Buttons in the bottom left corner allow for viewing the PO in the Change order and Blanket Release Entry Screen screen, viewing the supplier information, Recieving or Vouchering the PO.
Highlight a work order on the Work Orders tab.
In the top section is a list of all the PM Procedures for the equipment on that Work order. Highlight a PM and see the scheduling details in the section in the bottom including Lats reading, Last Done, and Next Due.
The View PM button will open the selected PM in the PM Procedure Entry Window.
The New PM button will open the PM Procedure Entry window to create a new PM.
Generate PM Work Order opens the PM Manual Scheduler with the selected Equipment filled in the Equipment # field.
Function Buttons
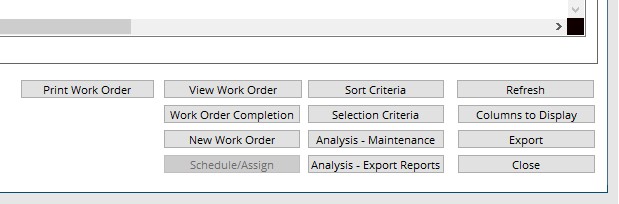
Print Work Order – Click this button to bring up the WO Print screen with the highlighted WO already filled in.
View Work Order – Click this button to view a selected work order in the Work Planning screen.
Use the Planning screen to plan the work order, then come back to the console and hit refresh to have the changes reflected on the console.
Work Order Completion – Click this button to open the selected work order in the Work Order Completion screen.
Use the Completion screen to add time and materials to the work order and to mark it as complete.
Tip: Use the Enable Multi Selection check box to select more than one work order then use the buttons listed above to edit or print multiple work orders.
New Work Order – Click this button to open the Work Planning screen with a new work order number.
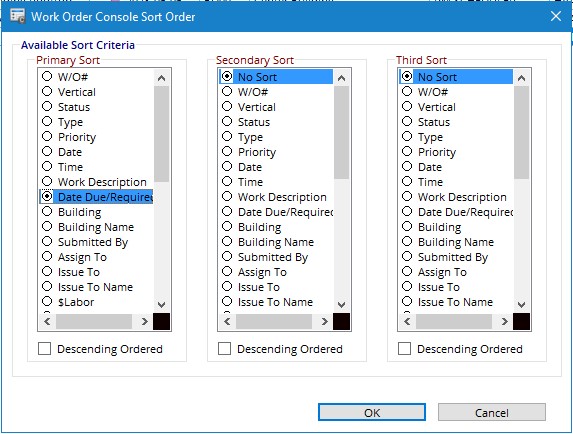
There are 3 sorts, each with a list of fields to choose from and an option to switch to descending order.
Example: To see all the work orders for each building grouped together with the newest ones on top set the Primary Sort to Building ID, set Secondary Sort to Date, and check the box for Descending Order on the secondary sort.
After hitting OK on the sort Criteria window it will close and the console with refresh to reflect the changes.
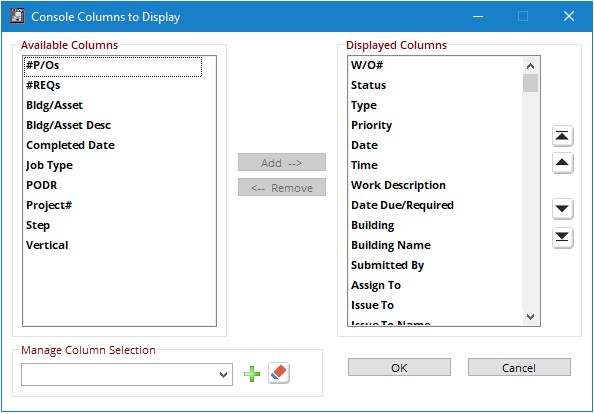
Use the Add and Remove buttons to move to and from the displayed columns pane of the window. Columns can be re-ordered using the arrow buttons on the right. Hit ok to save and the console will refresh.
Export will export the information displayed on the console to Excel. All rows and columns will export as they are shown on the console.
List of Work Orders
The list of work orders reflects the results of the selection criteria and is ordered based on the sort criteria.
From here, double-click on a work order to open it in the Work Planning screen or right-click to access other functions.
Some of the functions such as View PM and View Project are only available for work orders that have these things attached.
Work Order Completion with open the work order in the Work Order Completion screen.
Print work order will bring up the WO Print screen with the highlighted WO already filled in.
View work order does the same as double click and opens the work order in the Planning screen.
Due Dates with Colored Indicators
The WO Console’s Date Due/Required column is unique because it features colored indicators. The Green indicator means the work order is due 3 or more days from now, the yellow means it is due within 3 days and the red means it is past due. These indicators will only show for open work orders.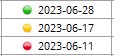
Planning Mode
The planning mode is a different way of sorting and filtering work orders. It allows setting criteria and even editing the work orders right from the console.